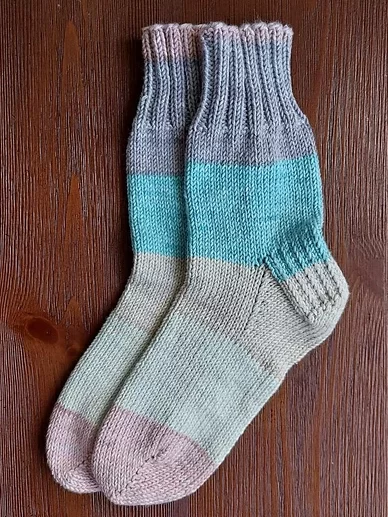
Are you looking for the perfect base sock pattern? Sock-It-To-You are the fast, simple knitted socks pattern that you will come back to and make time and time again. Worked in the round with 8 ply yarn these socks come together so quickly. These simple knitted socks use all the best techniques to ensure you achieve perfect, professional looking socks with ease whether you are a first time socker or an old hand.

Sizing
This is written for 3 width/depth sizes (S/M/L) with length easily customisable.
S would suit a standard width/depth of a US womens size 6-7
M would suit a standard width/depth of a US womens size 8-9
L would suit a standard width/depth of a US womens size 10-11
So for example, if you usually fit a standard width size 8.5 you would make a M. However, if you need a narrow fit, an S. Or a wide fit, you would make L.
Yarn
These simple knitted socks are made with 8ply or DK yarn.
When choosing what kind of yarn, I highly recommend using natural or natural blend fibres as you will find your feet appreciate the breathability natural fibres offer. For winter socks, wool or alpaca yarn will keep your feet beautifully toasty or for summer socks/boot socks, cotton or bamboo will offer great strength and cooling properties.
I do highly recommend choosing machine washable yarn for these simple knitted socks!
Needles
US 3/3.25mm in whatever format you like using to work in the round.
Personally, I cannot recommend highly enough using a single small round needle to make these simple knitted socks. I use a Addi 25cm 3.25mm round needle. It makes knitting socks actually enjoyable and you can pop it down to chase after a wild toddler at any given moment without creating issues! (not at all sponsored, just my opinion.)
Having a spare straight 3.25mm needle to use when working back and forth on the heel and toe makes life easier. As does having a crochet hook on hand for picking up stitches.
Gauge
Cast on 12 stitches.
Using a slip stitch edge on both sides (10 center stitches), working 15 rows of stockinette stitch to achieve a 1.5″ square.
Abbreviations
sl1 – slip 1 st
Sl1wyif – slip 1 st purlwise with the yarn held in front
k2tog – k 2 sts together
p2tog – p 2 sts together
ssk – slip, slip, knit: slip 1 st knitwise, slip another st knitwise, insert left needle into the front of
the 2 slipped sts, knit them together
anch – anchor stitch. Take yarn to opposite site (either bring to front if knitting, or take to back if purling) slip next stitch, take yarn back to its working side then return stitch (without twisting) to left hand needle. Essentially this wraps the yarn around the stitch to anchor it, creating strength in the toe.
Pattern
Cuff
Cast on 40 (48, 56) sts using long tail cast on. Joining in the round, slip the first stitch without twisting. Through the front of the needle, pick up the tail and place it over to the back between the needles. Tie it to the working yarn. Slip first stitch back onto the left hand needle. (I know this sounds like a bit of stuffing around but it really takes 2 seconds and trust me, it will give you a beautifully even and strong join). Place a beginning of round marker.
2×2 Ribbing
k2, p2 to the end of the rnd.
Repeat for a total of (18,20,22) rounds.
Leg
Work (26,30,34) rounds of stocking stitch (knit every stitch in the round)
Heel Flap
Heel flap is knitted flat (back and forth, rather than in the round) across the first (20,24,28) stitches.
Heel Flap Pattern
row 1 (rs): (sl1, k1) across row.
row 2 (ws): sl1wyif, p sts to end of row.
Repeat these 2 rows a total of 9(11, 13) times.
Knit row 1 one more time.
Heel Turn
row 1 (ws): sl1wyif, p(11,13, 15), p2tog, p1, turn.
row 2 (rs): sl1, k5, k2tog, k1, turn.
row 3: sl1wyif, p to one st before gap, p2tog across gap, p1, turn.
row 4: sl1, k to one st before gap, k2tog across gap, k1, turn.
Repeat rows 3 and 4 until there is only 1 stitch unworked on both wrong and right sides.
next row (ws): sl1wyif, p to last 2 sts, p2tog.
last row (rs): sl1, k to last 2 sts, k2tog.
Now there are 12(14, 16) sts on the back needle.
Gusset Set-Up and Decrease
Rnd 1 – Pick up (10,12,14) sts along the slipped st edge. Place a marker. Work remaining stitches in stocking stitch.
Rnd 2 – Pick up (10,12,14) sts along the slipped st edge. Work stocking stitch along the heel flap, first lot of picked up stitches and remaining stitches until returned to the beginning of the round.
Decreasing:
Rnd 1 – k1, ssk, k to 3 stitches before next marker, k2tog, k1, pass marker, k remaining (20,24,28).
Rnd 2 – k all stitches
Repeat rows 1 and 2 until there are (40,48,56) stitches total again.
Work in stocking stich until work measures (1.5”, 1.75”, 2”) less than the desired total length.
Toe
The toe is turned back and forth on the second (top) half of the sock then joined underneath using kitchener stitch.
Knit to first marker.
K until 1 stitch remain, anch, turn.
P until 1 stitch remain, anch, turn.
K until 2 stitches remain, anch, turn.
P until 2 stitches remain, anch, turn.
Continue in this fashion with your last 2 rows leaving (7, 8, 9) stitches remaining.
Now you are at the tip of the toe.
K until (6,7,8) stitches remain, anch, turn.
P until (6,7,8) stitches remain, anch, turn.
K until (5,6,7) stitches remain, anch, turn.
P until (5,6,7) stitches remain, anch, turn.
Continue in this fashion until you anchor the last stitch of each row.
Cut yarn with a long tail and graft using kitchener stitch.
Here is the tutorial I used to teach myself kitchener stitch:
If you haven’t done kitchener stitch before, it can seem a little daunting and can be tricky to get tension right. Don’t be alarmed though, give it a crack and you can always go along with a needle and adjust the tension before you tie off. Also, these are designed so the join is under the foot, so even if it’s a bit wild on your first few pairs, fret not, no one will ever see it!
I hope you love your simple knitted socks!!!!!